How To setup Kodi Xbmc
An Android TV box is a small device which, once connected to your TV, will turn it into a smart TV powered by Android.
No need to buy a new TV set, simply connect an HDMI or AV cables to fire up the smart tv box. Pretty simple installation and cheap too: less than $100 bucks as opposed to $1000+ for a new smart tv.
Once connected, your TV experience will never be the same again. YouTube, Facebook, apps, games, music, movies and more will all be available for you to access straight from the comfort of your sofa.
Nothing to watch on TV? Have a look at what YouTube is suggesting you or download a movie from the Google play store. The possibilities are endless!
In this step by step guide, I will show how you can setup your own android tv box to watch unlimited free tv content.
There are two approaches for you to enjoy the magic of an android smart tv:
DFY – Done For You Approach
Here you simply buy an already setup android unit preinstalled with Kodi/xbmc.
Read my detailed review here for some solid recommendations on which tv box to pick.
DIY – Do it Yourself Approach
In this particular case you will buy the tv box, generally loaded with the android operating system version 4.xxx. You would then install kodi/xbmc and its addons/pugins allowing you to watch unlimited multimedia content.
This tutorial is geared toward the second approach e.g DIY so here is How to setup kodi xbmc :
Part 1: Get your android device
As I will be discussing the DIY approach, one of the prerequisite is to get your own android tv unit that you will load with Kodi (xbmc) in order to watch unlimited multimedia content.
You can grab a device here for as low as $40. It comes preloaded with the Android operating system.
Part 2: Install and configure Kodi
What is Kodi?
Kodi is a media center (formerly XBMC) originally developed for the first-generation Xbox game console. It is open source.
Kodi is available for Windows, Linux, Mac OS X, iOS and Android. You can use Kodi to play movies, TV shows, home videos, PVR & live TV, music, pictures, and games.
[lockercat]Click Here To Download the PDF File[/lockercat]
Install Kodi
Kodi is now officially available through the Google Play store. I recommend this method of installation as opposed to the sideloading.
Install Kodi for Android from the Google Play Store
Kodi is finally available for easy installation to Android through the Google Play store. This means that you don’t have to go through the tedious task of sideloading anything, you can just install it as you would any other normal Android app.
Step 1: Launch the “Play Store” from your Android device.
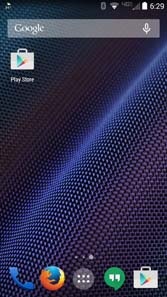
Note: You need to login to your Google account at this point if you haven’t already done so.
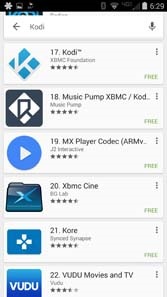
Step 2: Search for the “Kodi” app.
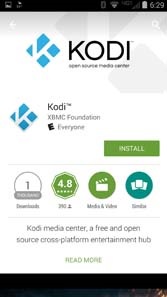
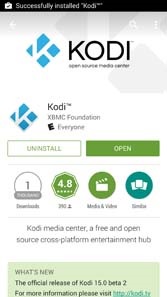
Step 3: Click on the green “INSTALL” button.
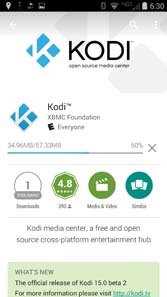
Step 4: Wait a few minutes for the application to download and install.
Step 5: Once the installation is complete, click on the “OPEN” button to launch Kodi for the first time.
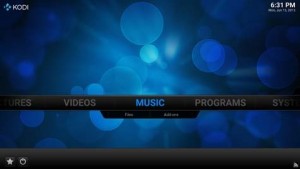
Step 6: Wait a few seconds while Kodi prepares for first launch.

Step 7: You’ll probably want to go ahead and configure your Kodi setup with all the amazing add-ons and goodies available at this point.
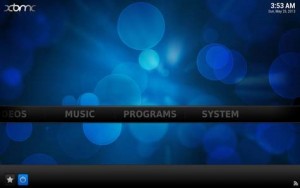
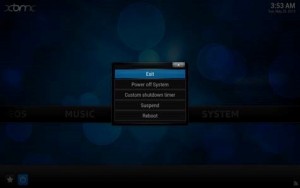
Step 8: Exit Kodi by clicking the little power button looking icon in the lower left hand corner of your screen.
Step 9: If prompted, click on the “Exit” button at this point.
Congratulations! It can’t really get any easier than that.
Install Kodi for Android using sideloading
- Step 1: Navigate to the “Settings” menu icon on your Android device.
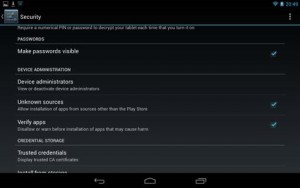
- Step 2: Select the “Security” sub menu.

- Step 3: Enable the “Unknown sources” option.
- Step 4: Open up the device’s built-in “Web Browser” application.

- Step 5: Navigate to the official Kodi downloads page at the following link: http://kodi.tv/download/
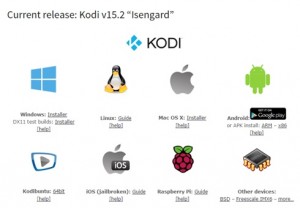
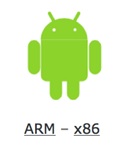
- Step 6: Download the latest stable version of Kodi for Android by clicking on the link under the Android icon.
You’ll want to use the “ARM” version unless you’re on a very old device.
- Step 7: Don’t close your device’s web browser for a few minutes until the application is finished downloading.
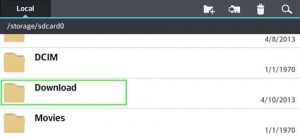
- Step 8: Navigate to the “Download” folder on your Android device through the “File manager” application, or open up the Downloads context menu within the Web Browser application.
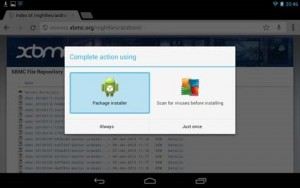
- Step 9: Click on the downloaded Kodi APK file and choose to open it at the prompt. If prompted, choose to complete action using the “Package installer” tool.
- Step 10: Confirm that you wish to install Kodi to your Android device.
- Step 11: Wait a minute while the install process takes place.
- Step 12: Once install is complete, choose to “Open” the Kodi application for the first time.
- Step 13: Let it sit and run a few updates for the first couple of minutes on the first run prior to use.
- Step 14: Exit Kodi by clicking the little power button looking icon in the lower left hand corner of your screen.
- Step 15: If prompted, click on the “Exit” button at this point.
- Step 16: You’ll probably want to go ahead and configure your Kodi setup with all the amazing add-ons and goodies available at this point.
Congratulations! You’ve now managed to install Kodi to your Android device, at least I hope so.
[lockercat]Click Here To Download the PDF File[/lockercat]
Configure Kodi to watch free TV
Once you’ve installed Kodi, you’ll need to enable third party Kodi addons in order to gain access to all that endless content you want to watch. There are a few different ways to install unofficial Kodi addons to your setup, but first you’ll need to configure some repositories.
Repositories are where all the Add-ons which give kodi it amazing abilities are.
There are basically where all the software (Add-ons) for Kodi are.
You need to add Repositories, in order to access the zip files containing the Add-ons!
There are many unofficial Kodi repositories but the one that I recommend is Super Repo (SR). It has most of the programs that every Kodi user will want.
Repositories are added as sources in Kodi.
Install SuperRepo
- Open Kodi
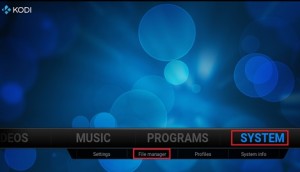
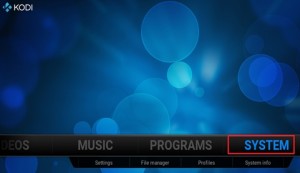
- Select SYSTEM > File Manager
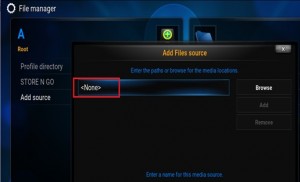
- Select Add Source
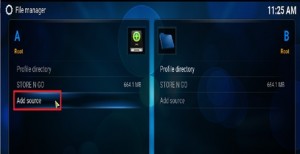
- Select None
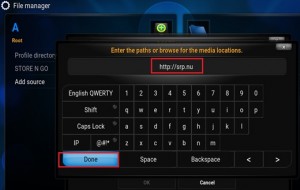
- Type the following EXACTLY http://srp.nu and select Done
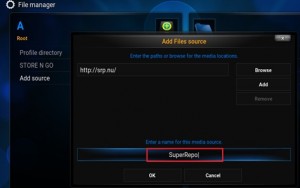
- Highlight the box underneath Enter a name for this media Source & type SuperRepo and Click on Ok
The SuperRepo is now on your Kodi device.
To access the wide range of repos and add-ons that are available through this just do the following.
- Go back to your Home Screen
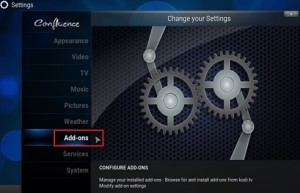
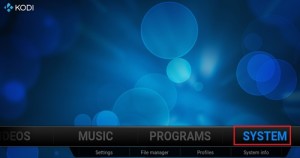
- Select SYSTEM
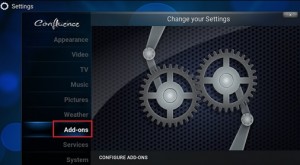
- Select Add-Ons
- Select Install from zip file
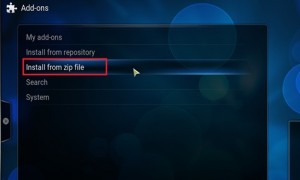
- Select SuperRepo
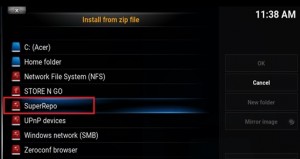
- In this section you choose the directory that is suitable for your device; If you are on Kodi version 14.xx choose Helix, v15.xx choose Isengard and v16.xx choose Jarvis. For this guide we will choose isengard as it will be what most are running

- In here select All. This means it will give you the repo that contains ALL the add-ons available from the Super Repo
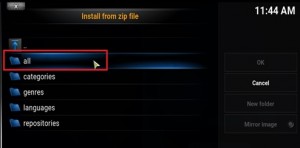
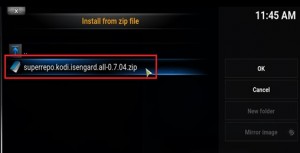
- Select Superrepo.kodi.isengard.all-x.x.x.zip (it will obviously be differently named if you are not using isengard)
- Wait for the Add-on enabled notification or until the Checking for add-on updates progress bar is completed.

Add Add-ons for Content
You now have the Super Repo installed on your device. Whenever you want to get an add-on from the repo you would do the following
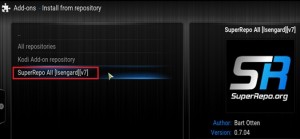
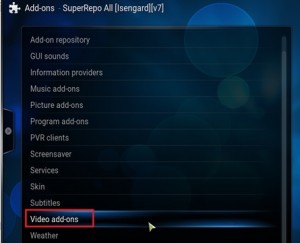
Select SYSTEM > Add-Ons > Get Add-Ons (or Install from Repository on Isengard) > Super Repo All [version name]

You can then scroll through to find the add-on you want : Music add-ons, Videos add-ons and so forth.
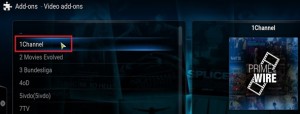
Let me show you how to enable the 1Channel Video add-on for instance:
- Click on Video add-on:
- Click on 1Channel
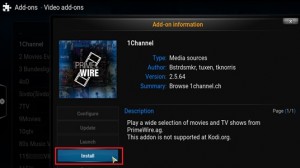
- Click on Install
- Wait for the Enabled status
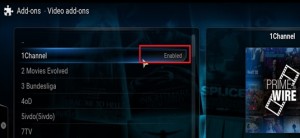
You would do the same for any other add-on you want to enable.
The most popular Video add-ons
Stream All The Sources
1Channel – The most reliable source for new movies and TV shows with the list being updated on a regular basis.
Genesis – for Movies and TV Shows.
IceFilms – A MUST HAVE! – Lots of Movies, TV, and Music
MoviesHD – Nice interface, and pulls down good quality content.
Additional Video add-ons you could use for movies (note these additional 7 add-ons, may causes Search interface issues, rendering the Search feature un-usable – You would NOT be able to search for Movies or TV Shows):
Movies 4K – Lots of movie content
The Mutts Nuts – Seems decent
Phoenix – Lots of Good Content – International Content
Xmovies8 – Decent Movie Content, nice interface – The Cinema Movies option is nice to watch what came out about a week ago in the theater
YouTube – There are movies on YouTube, as well as educational content, and all the user videos people are used to.
Navi-X gets lots of content
Favourite Music Add-Ons
Apple iTunes
icecast.org
iHeartRadio (Requires an account, and account configuration)
Metalvideo (If you like Heavy Metal Music)
Pandora
Radio
VEVO TV
XBMC MP3 addon
Youtube Music
Favourite Picture Add-ons
flickr
PicasaWeb
Facebook Media – This is a Service, but can be added under Pictures
Windows Wallpaper – This could plausibly be used to download backgrounds for Kodi, once the download path is configured in the Add-on.
Favourite Program Add-ons
.Xunity Maintenance
TR Total Installer
1Channel Theme Pack
Addon Installer
Axel Downloader
Facebook Media
Maintenance Tool
Navi-X
RSS Editor
[lockercat]Click Here To Download the PDF File[/lockercat]
Resources
http://mymediaexperience.com/xbmc-guide/
http://www.tvaddons.ag/install-kodi-android/
http://www.bestyoucanget.com/kodi.htm